Share
Australian Military History
The Battle of Kapyong Valley Part 1
Ep. 49
•
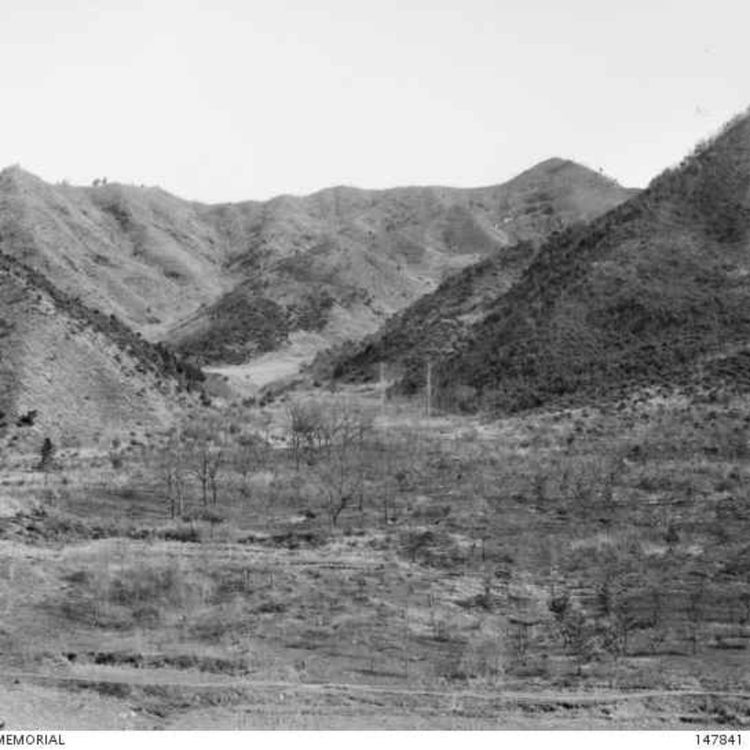
In April 1951, as troops from 3RAR were resting and preparing for Anzac Day commemorations, the Chinese army launched its largest offensive since its entry to the Korean War. The UN front collapsed and soon the Australians on the right of the Kapyong Valley, with Princess Patricia's Canadian Light Infantry Regiment on the left with some minor support units in between, would soon be all that stood between the Chinese army and a devastating victory.
More episodes
View all episodes
A Christmas Present
03:10|As promised in my last episode, I hereby present to you all a Christmas present to say thank you for your support throughout the year. Have a good one.
85. Pozieres - Taking the Village Part 3
52:02||Ep. 85Having advanced beyond the village of Pozieres, the 1st and 3rd Brigades of the 1st Division now attempted to realign themselves with the Old German (OG) Lines. The fighting by now was chaotic with orders being issued for local attacks, often without neighbouring units being aware. Miscommunicated orders also didn't help things. But advances were made, lost and made again. The 25th and 26th July 1916 would see the Australians subjected to further bombardment during the days and launching attacks at night. But by the 26th, the men were at the end of their endurance and the process of relieving the 1st Division with the 2nd Division began. https://www.australianmilitaryhistorypodcast.com/patreon.com/u46029761
84. Pozieres
34:24||Ep. 84After securing the ground on the southern edge of Pozieres village, along the Bapaume Road, the 1st Australian Division was ordered to use patrols to capture the remainder of the village, which higher command believed to be empty of Germans. The patrols met some success with positions established on the northern side of the village, but the Germans weren't going to let the Australians have it all their own way. The 24th July 1916 marked the beginning of what would become the signature feature of the battle for Pozieres; artillery.https://www.australianmilitaryhistorypodcast.com/patreon.com/u46029761
83. Pozieres
29:44||Ep. 83In 1916, the British launched the now infamous Battle of the Somme. Three weeks after the opening of the battle, the high ground around a small village in French Picardy remained in German hands. In the AIF's first major assault on the Western Front, the task of seizing Pozieres fell on the 1st Australian Division. The 23rd July would mark the beginning of the battle which would incur the greatest loss of life in Australian military history.https://www.australianmilitaryhistorypodcast.com/patreon.com/u46029761
Interview - Roland Perry
01:07:42|I recently interviewed Roland Perry about his new book Oliphant, the biography of arguably Australia's greatest mind and a man who played an instrumental role in the defeat of both Nazi Germany and Japan.https://www.patreon.com/c/u46029761?view_as=patronhttps://www.youtube.com/watch?v=ToyQ3ufqmB0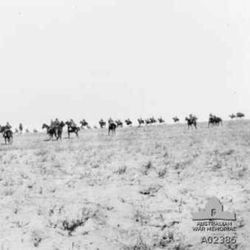
82. The Battle of Rafa
25:23||Ep. 82With the capture of Magdhaba and with El Arish more or less secured, the Desert Column was poised to leave the Sinai behind and entre Palestine. There was only one potential threat to that advance, the old Egyptian police post of Rafa. This strong defensive position gave the Turks better access to water than the British and Commonwealth forces could muster and so at the start of the day, the Turks held all the aces, unless of course they didn't know the attack was coming.https://www.australianmilitaryhistorypodcast.compatreon.com/u46029761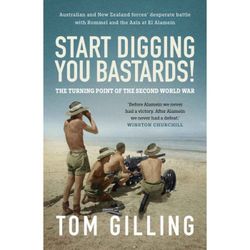
81. Interview - Tom Gilling
28:44||Ep. 81Start Digging You Bastards is the new book from Tom Gilling, following the deeds of the Australian 9th Division during the Battle of El Alamein. This month I interview Tom about El Alamein and the Australian's role in the "Turning Point of the War."australianmilitaryhistorypodcast.comhttps://www.patreon.com/c/user?u=46029761&view_as=patron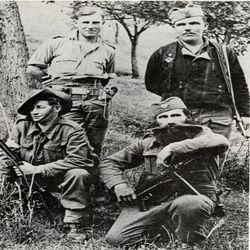
80. Guest Episode - Aussies In Yugoslavia
37:24||Ep. 80Something different this month as this is a topic I knew absolutely nothing about. Fortunately, someone who does know all about it is Edmund Goldrick, whose dulcet tones you will get to enjoy instead of my usual droning. Enjoyaustralianmilitaryhistorypodcast.comhttps://www.patreon.com/c/user?u=46029761&view_as=patron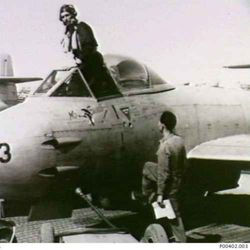
79. 77th Squadron RAAF in Korea
27:44||Ep. 79At the outbreak of the Korean War, the 77th Squadron were just packing up to leave Japan after five years with the occupation forces. Within a week they were flying their first combat mission of the war and would go on to forge a reputation as an effective fighting force, which the Commanding Officer of the US 5th Airforce said "set the pace".https://www.patreon.com/c/user?u=46029761&view_as=patronhttps://www.australianmilitaryhistorypodcast.com/